tonglin0325的个人主页

Scala学习笔记——内建控制结构

Scala的内建控制结构包括:if、while、for、try、match和函数调用

1.if表达式

1
2
3
4
5
6
7
8
9
10
11
12
13
//常见的写法
var filename = "name"
if (!args.isEmpty)
filename = args(0)

//比较简洁的写法
var filename1 =
if (!args.isEmpty) args(0)
else "name"

//更简洁的写法,不要有中间变量
println(if(!args.isEmpty) args(0) else "name")


2.while循环,while循环和其他语言的一样,有while和do while

**  Scala中对再次赋值语句的返回值是Unit,比如下面这个例子**


3.for表达式

1
2
3
4
5
6
7
8
9
10
11
12
13
14
15
16
17
18
19
20
21
22
23
24
25
26
27
28
29
30
31
32
33
34
35
36
37
38
//列出当前目录的文件和文件夹
val filesHere = (new java.io.File(".")).listFiles

for (file <- filesHere)
println(file)

//打印1到4
for (i <- 1 to 4)
println(i)

//打印1到3
for (i <- 1 until 4)
println(i)

//for循环中的过滤功能
for (file <- filesHere if file.getName.endsWith("project"))
println(file)

//for循环中的过滤功能,多个条件用;号分隔
for (file <- filesHere
if file.isFile;
if file.getName.endsWith("sbt")
) println(file)

//嵌套枚举
for( a <- 1 to 3; b <- 1 to 3){
println( "Value of a: " + a );
println( "Value of b: " + b );
}

//for循环采用yield,可以从存储中返回for循环中的变量的值,输出List(1, 2, 4, 5, 6, 7)
val numList = List(1,2,3,4,5,6,7,8,9,10)
System.out.println(
for{
a <- numList if a != 3; if a < 8
}yield a
)


4.使用try表达式处理异常

   抛出异常

1
2
3
4
5
6
7
//抛出异常
def isEven(n : Int): Unit ={
val half =
if (n % 2 == 0) n / 2
else throw new RuntimeException("n必须是偶数")
}

   捕获异常,finally语句

1
2
3
4
5
6
7
8
9
10
11
12
  val file = new FileReader("input.txt")
try {
//使用文件
} catch {
//捕获异常
case ex: FileNotFoundException =>
case ex: IOException =>
} finally {
//确保文件关闭
file.close()
}

全文 >>

Scala学习笔记——函数式对象

用创建一个函数式对象(类Rational)的过程来说明

类Rational是一种表示有理数(Rational number)的类

1
2
3
4
5
6
7
8
9
10
11
12
13
14
15
16
17
18
19
20
21
22
23
24
25
26
27
28
29
30
31
32
33
34
35
36
37
38
39
40
41
42
43
44
45
46
47
48
49
50
51
52
53
54
55
56
57
58
59
60
61
62
63
64
65
66
67
68
69
70
71
72
73
74
75
76
package com.scala.first

/**
* Created by common on 17-4-3.
*/
object Rational {
def main(args: Array[String]) {

var r1 = new Rational(1, 2)
var r2 = new Rational(1)
System.out.println(r1.toString)
System.out.println(r1.add(r2).toString)
var r3 = new Rational(2, 2)
System.out.println(r3)
System.out.println(r1 + r3)
}
}

class Rational(n: Int, d: Int) {
//检查先决条件,不符合先决条件将抛出IllegalArgumentException
require(d != 0)
//最大公约数
private val g = gcd(n.abs, d.abs)

private def gcd(a: Int, b: Int): Int = {
if (b == 0) a else gcd(b, a % b)
}

//进行约分
val numer: Int = n / g
val denom: Int = d / g

//辅助构造器
def this(n: Int) = this(n, 1)

//定义操作符
def +(that: Rational): Rational = {
new Rational(
numer * that.denom + that.numer * denom,
denom * that.denom
)
}

//方法重载
def +(i: Int): Rational = {
new Rational(
numer + i * denom, denom
)
}

def *(that: Rational): Rational = {
new Rational(
numer * that.numer,
denom * that.denom
)
}

//方法重载
override def toString = numer + "/" + denom

//定义方法
def add(that: Rational): Rational = {
new Rational(
numer * that.denom + that.numer * denom,
denom * that.denom
)
}

//定义方法,自指向this可写可不写
def lessThan(that: Rational): Boolean = {
this.numer * that.denom < that.numer * this.denom
}


}


Spark学习笔记——安装和WordCount

**1.**去清华的镜像站点下载文件spark-2.1.0-bin-without-hadoop.tgz,不要下spark-2.1.0-bin-hadoop2.7.tgz

2.把文件解压到/usr/local目录下,解压之后的效果,Hadoop和Spark都在Hadoop用户

下面的操作都在Hadoop用户下

1
2
drwxrwxrwx 13 hadoop hadoop 4096 4月&nbsp;&nbsp; 4 11:50 spark-2.1.0-bin-without-hadoop/

 添加Hadoop用户和用户组

1
2
3
4
$ sudo addgroup hadoop
$ sudo adduser --ingroup hadoop hadoop
$ sudo adduser hadoop sudo

 然后修改文件夹的用户,用户组以及权限

1
2
3
sudo chown -R hduser:hadoop spark-2.1.0-bin-without-hadoop
sudo chmod 777 hadoop/

 Hadoop文件夹如果权限不对的话,也需要修改

**3.**在/etc/profile下添加路径

1
2
3
export SPARK_HOME=/usr/local/spark-2.1.0-bin-without-hadoop
export PATH=${SPARK_HOME}/bin:$PATH

**4.**还需要修改Spark的配置文件spark-env.sh

1
2
3
cd /usr/local/spark-2.1.0-bin-without-hadoop
cp ./conf/spark-env.sh.template ./conf/spark-env.sh

添加如下

1
2
export SPARK_DIST_CLASSPATH=$(/home/lintong/software/apache/hadoop-2.9.1/bin/hadoop classpath)

全文 >>

Scala学习笔记——入门

0.在 scala> 下运行Scala程序

首先cd到.scala文件所在的目录下

scalac这个scala文件,然后import package的名字.object的名字

然后就能使用 object的名字.def的名字来运行这个def


1.表达式

1
2
3
scala> 1 + 2
res0: Int = 3


2.变量定义,Scala中有两种变量,一种是var,一种val,val类似于Java里面的final变量,一旦初始化了,val就不能再次被赋值了

1
2
3
4
5
scala> var str = "Hello World"
str: String = Hello World
#lazy关键字修饰的变量,定义时不赋值,真正使用的时候才赋值
var str = "Hello World"


3.函数定义

1
2
3
4
5
6
7
8
9
10
11
12
13
14
15
16
object HelloWord {

def main(args: Array[String]) {
println("Hello Word")
println(max(1, 2))
println(args(0)+" "+args(1))
}

def max(x: Int, y: Int): Int = {
if (x > y)
x
else
y
}
}

 输出

1
2
3
4
Hello Word
2
0 1


4.while循环和if判断

1
2
3
4
5
6
7
8
def printArg(args: Array[String]): Unit = {
var i = 0
while (i < args.length) {
println(args(i))
i += 1
}
}

全文 >>

Scala学习笔记——安装

安装scala,不要使用sudo apt-get install scala来安装

1.从下面网址来下载Scala文件

1
2
http://www.scala-lang.org/download/2.11.8.html

2.下载下的 scala-2.11.8.tgz 文件解压,然后把文件mv到/usr/local目录下

3.在/etc/profile目录下加上,不要忘记了source

1
2
3
export SCALA_HOME=/usr/local/scala-2.11.8
export PATH=$SCALA_HOME/bin:$PATH

 4.打软链接

1
2
sudo ln -s /usr/local/scala-2.11.8/bin/scala /usr/bin

 5.在终端中输入scala

1
2
3
4
5
Welcome to Scala 2.11.8 (Java HotSpot(TM) 64-Bit Server VM, Java 1.8.0_65).
Type in expressions for evaluation. Or try :help.

scala>

全文 >>

Maven常用命令

Apache官方仓库

1
2
https://repository.apache.org/

Maven中央仓库 

1
2
http://mvnrepository.com/

Maven介绍,包括作用、核心概念、用法、常用命令、扩展及配置

1
http://www.trinea.cn/android/maven/

Maven常用命令

1
2
http://www.cnblogs.com/kingfy/p/5665218.html


1. 创建Maven的普通java项目: 

有下面几种不同的DarchetypeArtifactId

1.省略默认是maven-archetype-quickstart  

1
2
mvn archetype:generate -DgroupId=com.xxxx.xxxx -DartifactId=test-project -DarchetypeCatalog=internal -DarchetypeArtifactId=maven-archetype-quickstart

工程目录结构

2.maven-archetype-archetype    包含一个archetype的例子,主要用于当我们要建立自己的archetype的时候

全文 >>

MySQL学习笔记——innoDB存储结构

1.MySQL的存储路径

1
2
3
4
5
6
7
8
mysql> SHOW VARIABLES LIKE 'datadir';
+---------------+----------------------+
| Variable_name | Value |
+---------------+----------------------+
| datadir | /var/lib/mysql/data/ |
+---------------+----------------------+
1 row in set (0.01 sec)
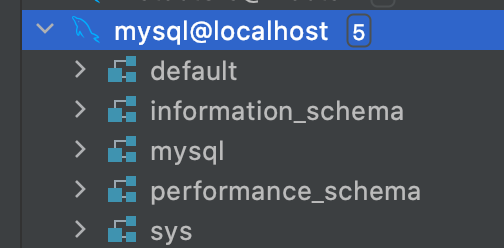
查看datadir目录下的所有文件夹

1
2
3
4
5
6
sh-4.2$ ls -l | grep '^d'
drwxr-x--- 2 mysql mysql 4096 Aug 24 12:36 default
drwxr-x--- 2 mysql mysql 4096 Jan 31 2024 mysql
drwxr-x--- 2 mysql mysql 4096 Jan 31 2024 performance_schema
drwxr-x--- 2 mysql mysql 12288 Jan 31 2024 sys

这和MySQL的database是对应的

其中default是创建的database,目录下会包含opt,frm和ibd文件

db.opt,用来存储当前数据库的默认字符集和字符校验规则。

frm(Form)文件存储表定义。

ibd(InnoDB Data)存储数据和索引文件。

1
2
3
4
5
sh-4.2$ pwd
/var/lib/mysql/data/default
sh-4.2$ ls
db.opt singer.frm singer.ibd song.frm song.ibd song_singer.frm song_singer.ibd t_user.frm t_user.ibd test.frm test.ibd user.frm user.ibd

information_schema 是每个MySQL实例中的一个数据库,存储MySQL服务器维护的所有其他数据库的信息。INFORMATION_SCHEMA数据库包含几个只读的表。它们实际上是视图,而不是基表,因此没有与它们关联的文件,而且你不能在它们上设置触发器。此外,没有使用该名称的数据库目录。

mysql 数据库为系统数据库。它包含存储MySQL服务器运行时所需信息的表。参考:https://dev.mysql.com/doc/refman/5.7/en/system-schema.html

performance_schema 是一个用于在底层监控MySQL服务器执行的特性。参考:https://dev.mysql.com/doc/refman/5.7/en/performance-schema-quick-start.html

sys schema,这是一组帮助dba和开发人员解释由Performance schema收集的数据的对象。Sys schema对象可用于典型的调优和诊断用例。参考:https://dev.mysql.com/doc/refman/5.7/en/sys-schema.html

参考:MySQL系统库作用:performance_schema,sys,information_schema,mysql

其他文件

1
2
3
4
5
6
7
8
9
10
11
12
13
14
15
16
17
18
19
sh-4.2$ ls -l | grep -v '^d'
total 41032
-rw-r----- 1 mysql mysql 56 Jan 31 2024 auto.cnf
-rw-r----- 1 mysql mysql 2 Aug 15 15:05 bc130f3f763a.pid
-rw------- 1 mysql mysql 1680 Jan 31 2024 ca-key.pem
-rw-r--r-- 1 mysql mysql 1112 Jan 31 2024 ca.pem
-rw-r--r-- 1 mysql mysql 1112 Jan 31 2024 client-cert.pem
-rw------- 1 mysql mysql 1680 Jan 31 2024 client-key.pem
-rw-r----- 1 mysql mysql 477 Aug 15 15:05 ib_buffer_pool
-rw-r----- 1 mysql mysql 8388608 Aug 24 15:25 ib_logfile0
-rw-r----- 1 mysql mysql 8388608 Aug 24 15:05 ib_logfile1
-rw-r----- 1 mysql mysql 12582912 Aug 24 15:25 ibdata1
-rw-r----- 1 mysql mysql 12582912 Aug 24 15:06 ibtmp1
-rw-r--r-- 1 mysql mysql 6 Jan 31 2024 mysql_upgrade_info
-rw------- 1 mysql mysql 1676 Jan 31 2024 private_key.pem
-rw-r--r-- 1 mysql mysql 452 Jan 31 2024 public_key.pem
-rw-r--r-- 1 mysql mysql 1112 Jan 31 2024 server-cert.pem
-rw------- 1 mysql mysql 1676 Jan 31 2024 server-key.pem

全文 >>

Hadoop学习笔记——WordCount

1.在IDEA下新建工程,选择from Mevan

GroupId:WordCount

ArtifactId:com.hadoop.1st

Project name:WordCount

2.pom.xml文件

1
2
3
4
5
6
7
8
9
10
11
12
13
14
15
16
17
18
19
20
21
22
23
24
25
26
27
28
29
30
31
32
33
34
35
36
37
38
39
40
41
42
43
44
45
<?xml version="1.0" encoding="UTF-8"?>
<project xmlns="http://maven.apache.org/POM/4.0.0"
xmlns:xsi="http://www.w3.org/2001/XMLSchema-instance"
xsi:schemaLocation="http://maven.apache.org/POM/4.0.0 http://maven.apache.org/xsd/maven-4.0.0.xsd">
<modelVersion>4.0.0</modelVersion>

<groupId>WordCount</groupId>
<artifactId>com.hadoop.1st</artifactId>
<version>1.0-SNAPSHOT</version>

<repositories>
<repository>
<id>apache</id>
<url>http://maven.apache.org</url>
</repository>
</repositories>

<dependencies>
<dependency>
<groupId>org.apache.hadoop</groupId>
<artifactId>hadoop-core</artifactId>
<version>1.2.1</version>
</dependency>
<dependency>
<groupId>org.apache.hadoop</groupId>
<artifactId>hadoop-common</artifactId>
<version>2.7.1</version>
</dependency>
</dependencies>

<build>
<plugins>
<plugin>
<artifactId>maven-dependency-plugin</artifactId>
<configuration>
<excludeTransitive>false</excludeTransitive>
<stripVersion>true</stripVersion>
<outputDirectory>./lib</outputDirectory>
</configuration>

</plugin>
</plugins>
</build>
</project>

 3.main/java目录下新建WordCount.java文件

1
2
3
4
5
6
7
8
9
10
11
12
13
14
15
16
17
18
19
20
21
22
23
24
25
26
27
28
29
30
31
32
33
34
35
36
37
38
39
40
41
42
43
44
45
46
47
48
49
50
51
52
53
54
55
56
57
58
59
60
61
62
63
64
65
66
67
68
69
70
71
72
73
import org.apache.hadoop.conf.Configuration;
import org.apache.hadoop.fs.Path;
import org.apache.hadoop.io.IntWritable;
import org.apache.hadoop.io.LongWritable;
import org.apache.hadoop.io.Text;
import org.apache.hadoop.mapreduce.Job;
import org.apache.hadoop.mapreduce.Mapper;
import org.apache.hadoop.mapreduce.Reducer;
import org.apache.hadoop.mapreduce.lib.input.FileInputFormat;
import org.apache.hadoop.mapreduce.lib.input.TextInputFormat;
import org.apache.hadoop.mapreduce.lib.output.FileOutputFormat;
import org.apache.hadoop.mapreduce.lib.output.TextOutputFormat;

import java.io.IOException;
import java.util.StringTokenizer;


/**
* Created by common on 17-3-26.
*/
public class WordCount {
public static class WordCountMap extends
Mapper<LongWritable, Text, Text, IntWritable> {

private final IntWritable one = new IntWritable(1);
private Text word = new Text();

public void map(LongWritable key, Text value, Context context)
throws IOException, InterruptedException {
String line = value.toString();
StringTokenizer token = new StringTokenizer(line);
while (token.hasMoreTokens()) {
word.set(token.nextToken());
context.write(word, one);
}
}
}

public static class WordCountReduce extends
Reducer<Text, IntWritable, Text, IntWritable> {

public void reduce(Text key, Iterable<IntWritable> values,
Context context) throws IOException, InterruptedException {
int sum = 0;
for (IntWritable val : values) {
sum += val.get();
}
context.write(key, new IntWritable(sum));
}
}

public static void main(String[] args) throws Exception {
Configuration conf = new Configuration();
Job job = new Job(conf);
job.setJarByClass(WordCount.class);
job.setJobName("wordcount");

job.setOutputKeyClass(Text.class);
job.setOutputValueClass(IntWritable.class);

job.setMapperClass(WordCountMap.class);
job.setReducerClass(WordCountReduce.class);

job.setInputFormatClass(TextInputFormat.class);
job.setOutputFormatClass(TextOutputFormat.class);

FileInputFormat.addInputPath(job, new Path(args[0]));
FileOutputFormat.setOutputPath(job, new Path(args[1]));

job.waitForCompletion(true);
}
}

 4.在src同级目录下新建input目录,以及下面的test.segmented文件

test.segmented文件内容

1
2
3
4
5
6
7
8
9
10
11
12
13
aa
bb
cc
dd
aa
cc
ee
ff
ff
gg
hh
aa

4.在run configuration下设置运行方式为Application

5.运行java文件,将会生成output目录,part-r-00000为运行的结果,下次运行必须删除output目录,否则会报错


Hadoop学习笔记——安装Hadoop

1
2
3
4
sudo mv /home/common/下载/hadoop-2.7.2.tar.gz /usr/local
sudo tar -xzvf hadoop-2.7.2.tar.gz
sudo mv hadoop-2.7.2 hadoop #改个名

 在etc/profile文件中添加

1
2
3
export HADOOP_HOME=/usr/local/hadoop
export PATH=.:$PATH:$JAVA_HOME/bin:$HADOOP_HOME/bin

 1.修改/usr/local/hadoop/etc/hadoop/hadoop-env.sh文件

1
2
export JAVA_HOME=/usr/lib/jvm/jdk1.8.0_121

2.修改/usr/local/hadoop/etc/hadoop/core-site.xml文件

1
2
3
4
5
6
7
8
9
10
11
12
13
14
15
16
17
<configuration>

<property>
<name>fs.default.name</name>
<value>hdfs://master:9000</value>
</property>
<property>
<name>hadoop.tmp.dir</name>
<value>~/software/apache/hadoop-2.9.1/tmp</value>
</property>
<property>
<name>hadoop.native.lib</name>
<value>false</value>
</property>

</configuration>

 在/etc/hosts中添加自己的外网ip

1
2
XXXX    master

 如果在工程中需要访问HDFS,需要在resources中添加 core-site.xml文件

1
2
3
4
5
6
7
8
9
10
11
12
13
14
15
16
17
18
19
20
21
22
23
24
25
26
27
<?xml version="1.0" encoding="UTF-8"?>
<?xml-stylesheet type="text/xsl" href="configuration.xsl"?>
<!--
Licensed under the Apache License, Version 2.0 (the "License");
you may not use this file except in compliance with the License.
You may obtain a copy of the License at

http://www.apache.org/licenses/LICENSE-2.0

Unless required by applicable law or agreed to in writing, software
distributed under the License is distributed on an "AS IS" BASIS,
WITHOUT WARRANTIES OR CONDITIONS OF ANY KIND, either express or implied.
See the License for the specific language governing permissions and
limitations under the License. See accompanying LICENSE file.
-->

<!-- Put site-specific property overrides in this file. -->

<configuration>

<property>
<name>fs.defaultFS</name>
<value>hdfs://master:9000</value>
</property>

</configuration>


全文 >>

Ubuntu下从外网上北邮人BT

1.使用VPN+ipv6(测试于2017-01,该方法已经不可用)

首先你需要有北邮的VPN账号和密码,只要是北邮的学生都有

账号和密码不懂的请查看 VPN账号密码说明

接下来登录https://sslvpn.bupt.edu.cn,输入账号和密码

已经登录好了

但是还是不能上BYR BT,是因为没有把ipv4转成ipv6,在Ubuntu下进行转换很简单,

只需要安装miredo,

输入命令

1
2
sudo apt-get install miredo

全文 >>