tonglin0325的个人主页

go学习笔记——分布式事务框架DTM

DTM是一款开源的GO语言分布式事务管理器,解决跨数据库、跨服务、跨语言栈更新数据的一致性问题。

DTM可适合多语言栈的公司使用。方便go、python、php、nodejs、ruby、c# 各类语言使用。

支持的分布式事务协议包括:SAGA,TCC,XA和二阶段消息这几种模式。

官方网站:https://dtm.pub/

1.启动DTM服务

参考:https://dtm.pub/guide/install.html#%E4%BA%8C%E8%BF%9B%E5%88%B6%E5%8C%85%E4%B8%8B%E8%BD%BD%E5%AE%89%E8%A3%85

项目

1
2
https://github.com/dtm-labs/dtm

git dtm项目

1
2
git clone https://github.com/dtm-labs/dtm && cd dtm

启动dtm

1
2
./dtm

dtm运行后,会监听两个端口

1
2
3
http:36789
grpc:36790

2.分布式事务协议

1.SAGA模式

Saga核心思想是将长事务拆分为多个短事务,由Saga事务协调器协调,如果每个短事务都成功提交完成,那么全局事务就正常完成,如果某个步骤失败,则根据相反顺序一次调用补偿操作。

适用场景:适合需要最终一致性的大型跨服务事务,且允许一定时间的临时不一致。

优点:实现简单,不需要锁定资源,性能高。

缺点:数据一致性较弱,可能存在短时间的不一致。

2.TCC模式

TCC分为3个阶段

  • Try 资源预留阶段:尝试执行,完成所有业务检查(一致性), 预留必须业务资源(准隔离性)
  • Confirm 确认阶段:如果所有分支的Try都成功了,则走到Confirm阶段。Confirm真正执行业务,不作任何业务检查,只使用 Try 阶段预留的业务资源
  • Cancel 取消阶段:如果所有分支的Try有一个失败了,则走到Cancel阶段。Cancel释放 Try 阶段预留的业务资源。

适用场景:适合强一致性要求的场景,例如支付扣款、库存预扣等需要确保每个操作的资源在短时间内完全一致。

优点:可以精细控制资源的锁定和释放,提高一致性。

缺点:实现复杂,需为每个操作编写补偿逻辑。

3.二阶段消息模式

4.XA模式

总结

  • 二阶段消息模式: 适合不需要回滚的场景
  • saga模式: 适合需要回滚的场景
  • tcc事务模式: 适合一致性要求较高的场景
  • xa事务模式: 适合并发要求不高,没有数据库行锁争抢的场景

全文 >>

golang项目引用GitHub私有仓库module

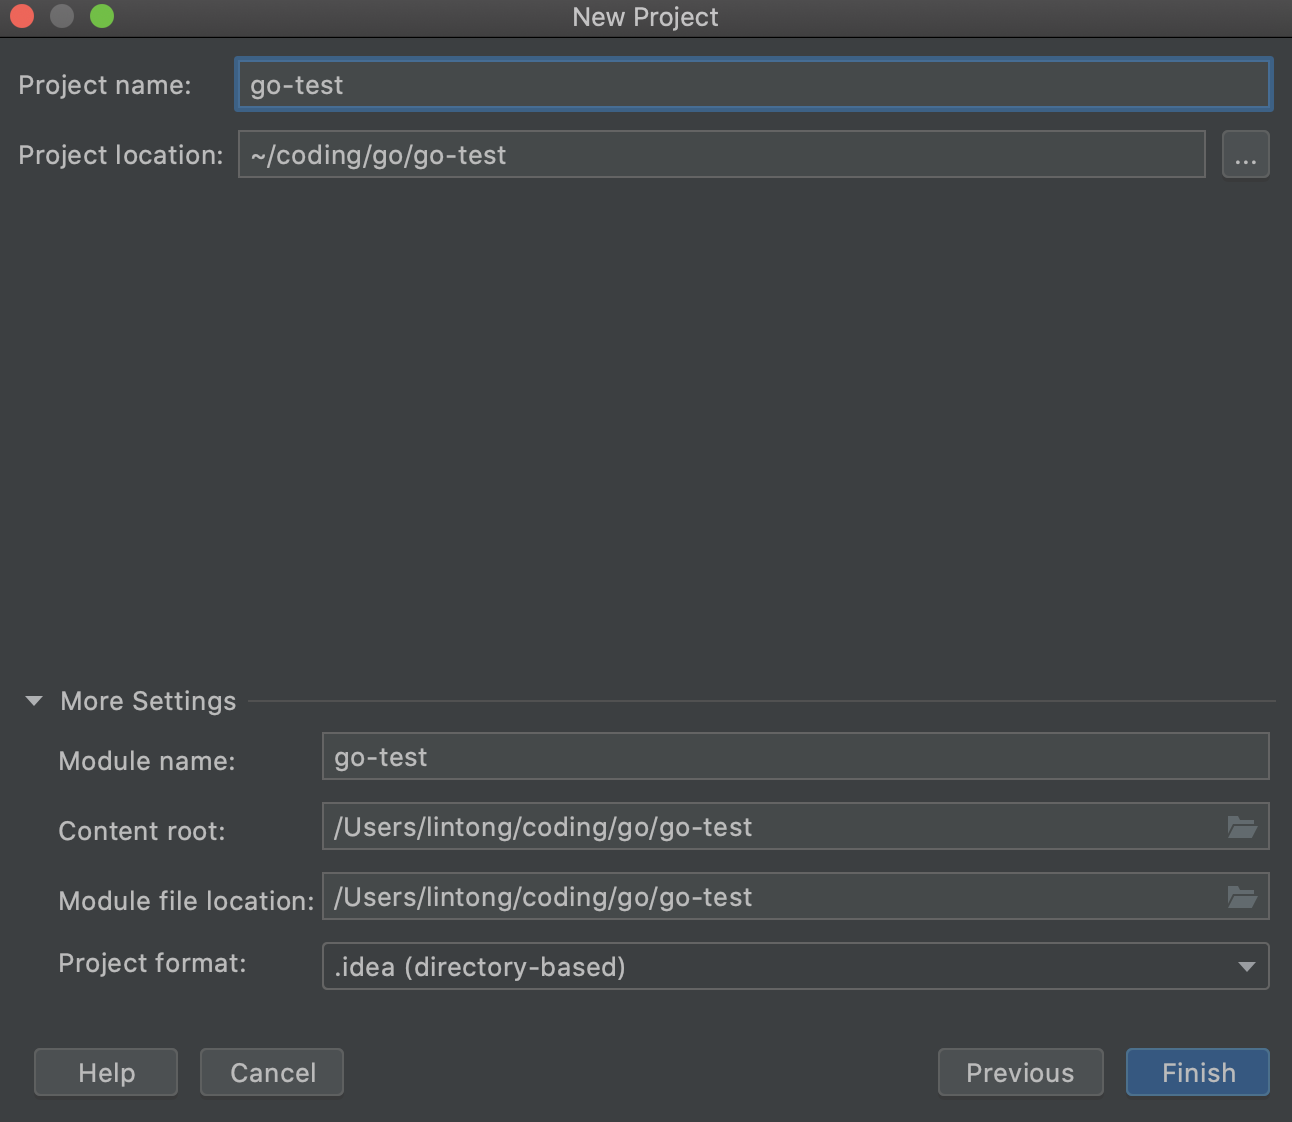
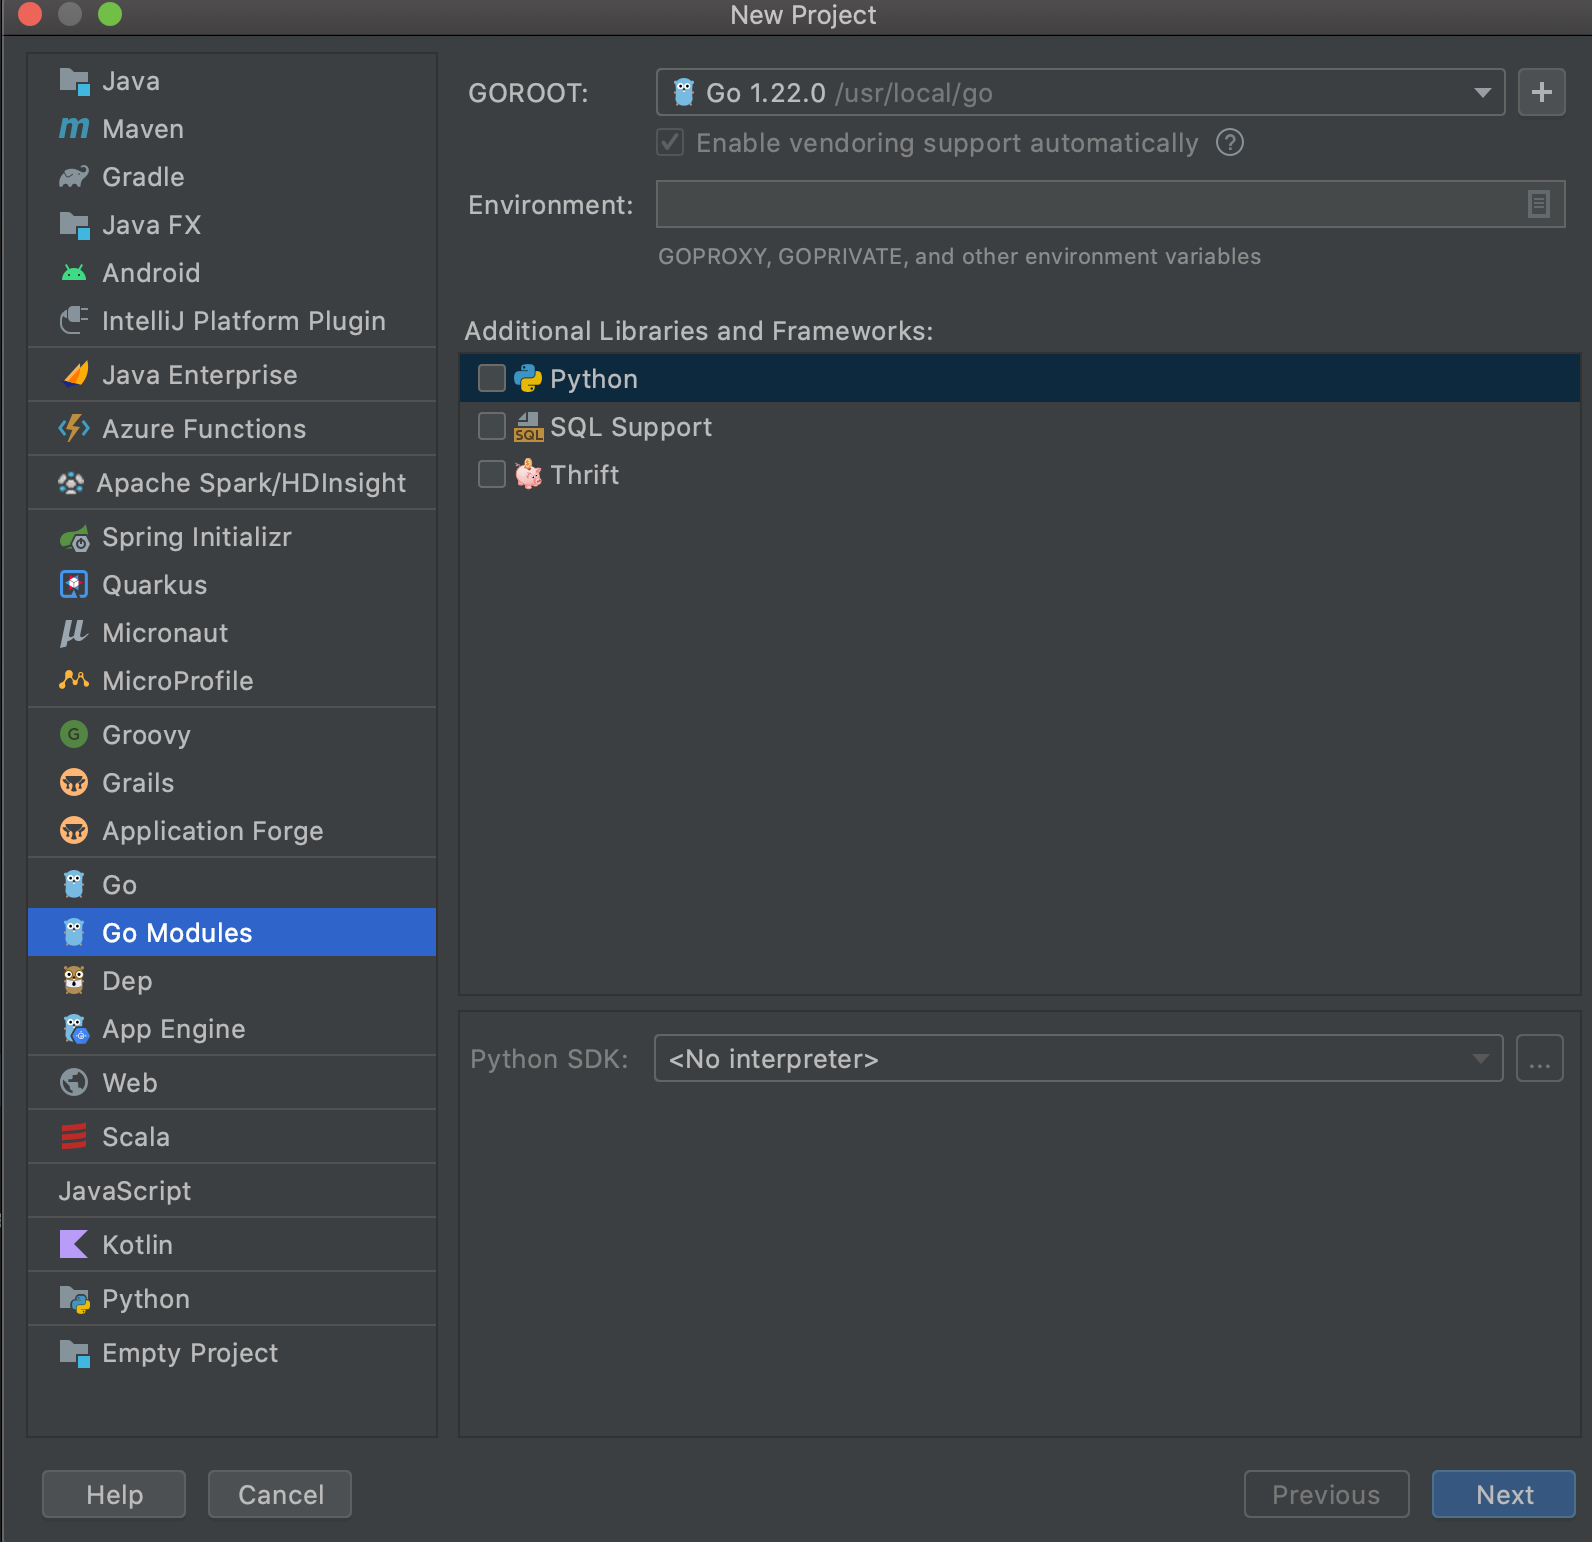
1.创建go module项目

module的名字假设为go-test

module项目创建成功后,将go.mod文件中的 module “go-test” 修改成

1
2
module "github.com/tonglin0325/go-test"

避免引用的时候go get报错,如下

1
2
3
4
5
go get github.com/tonglin0325/go-test@latest
go: github.com/tonglin0325/go-test@latest (v1.0.0) requires github.com/tonglin0325/go-test@v1.0.0: parsing go.mod:
module declares its path as: go-test
but was required as: github.com/tonglin0325/go-test

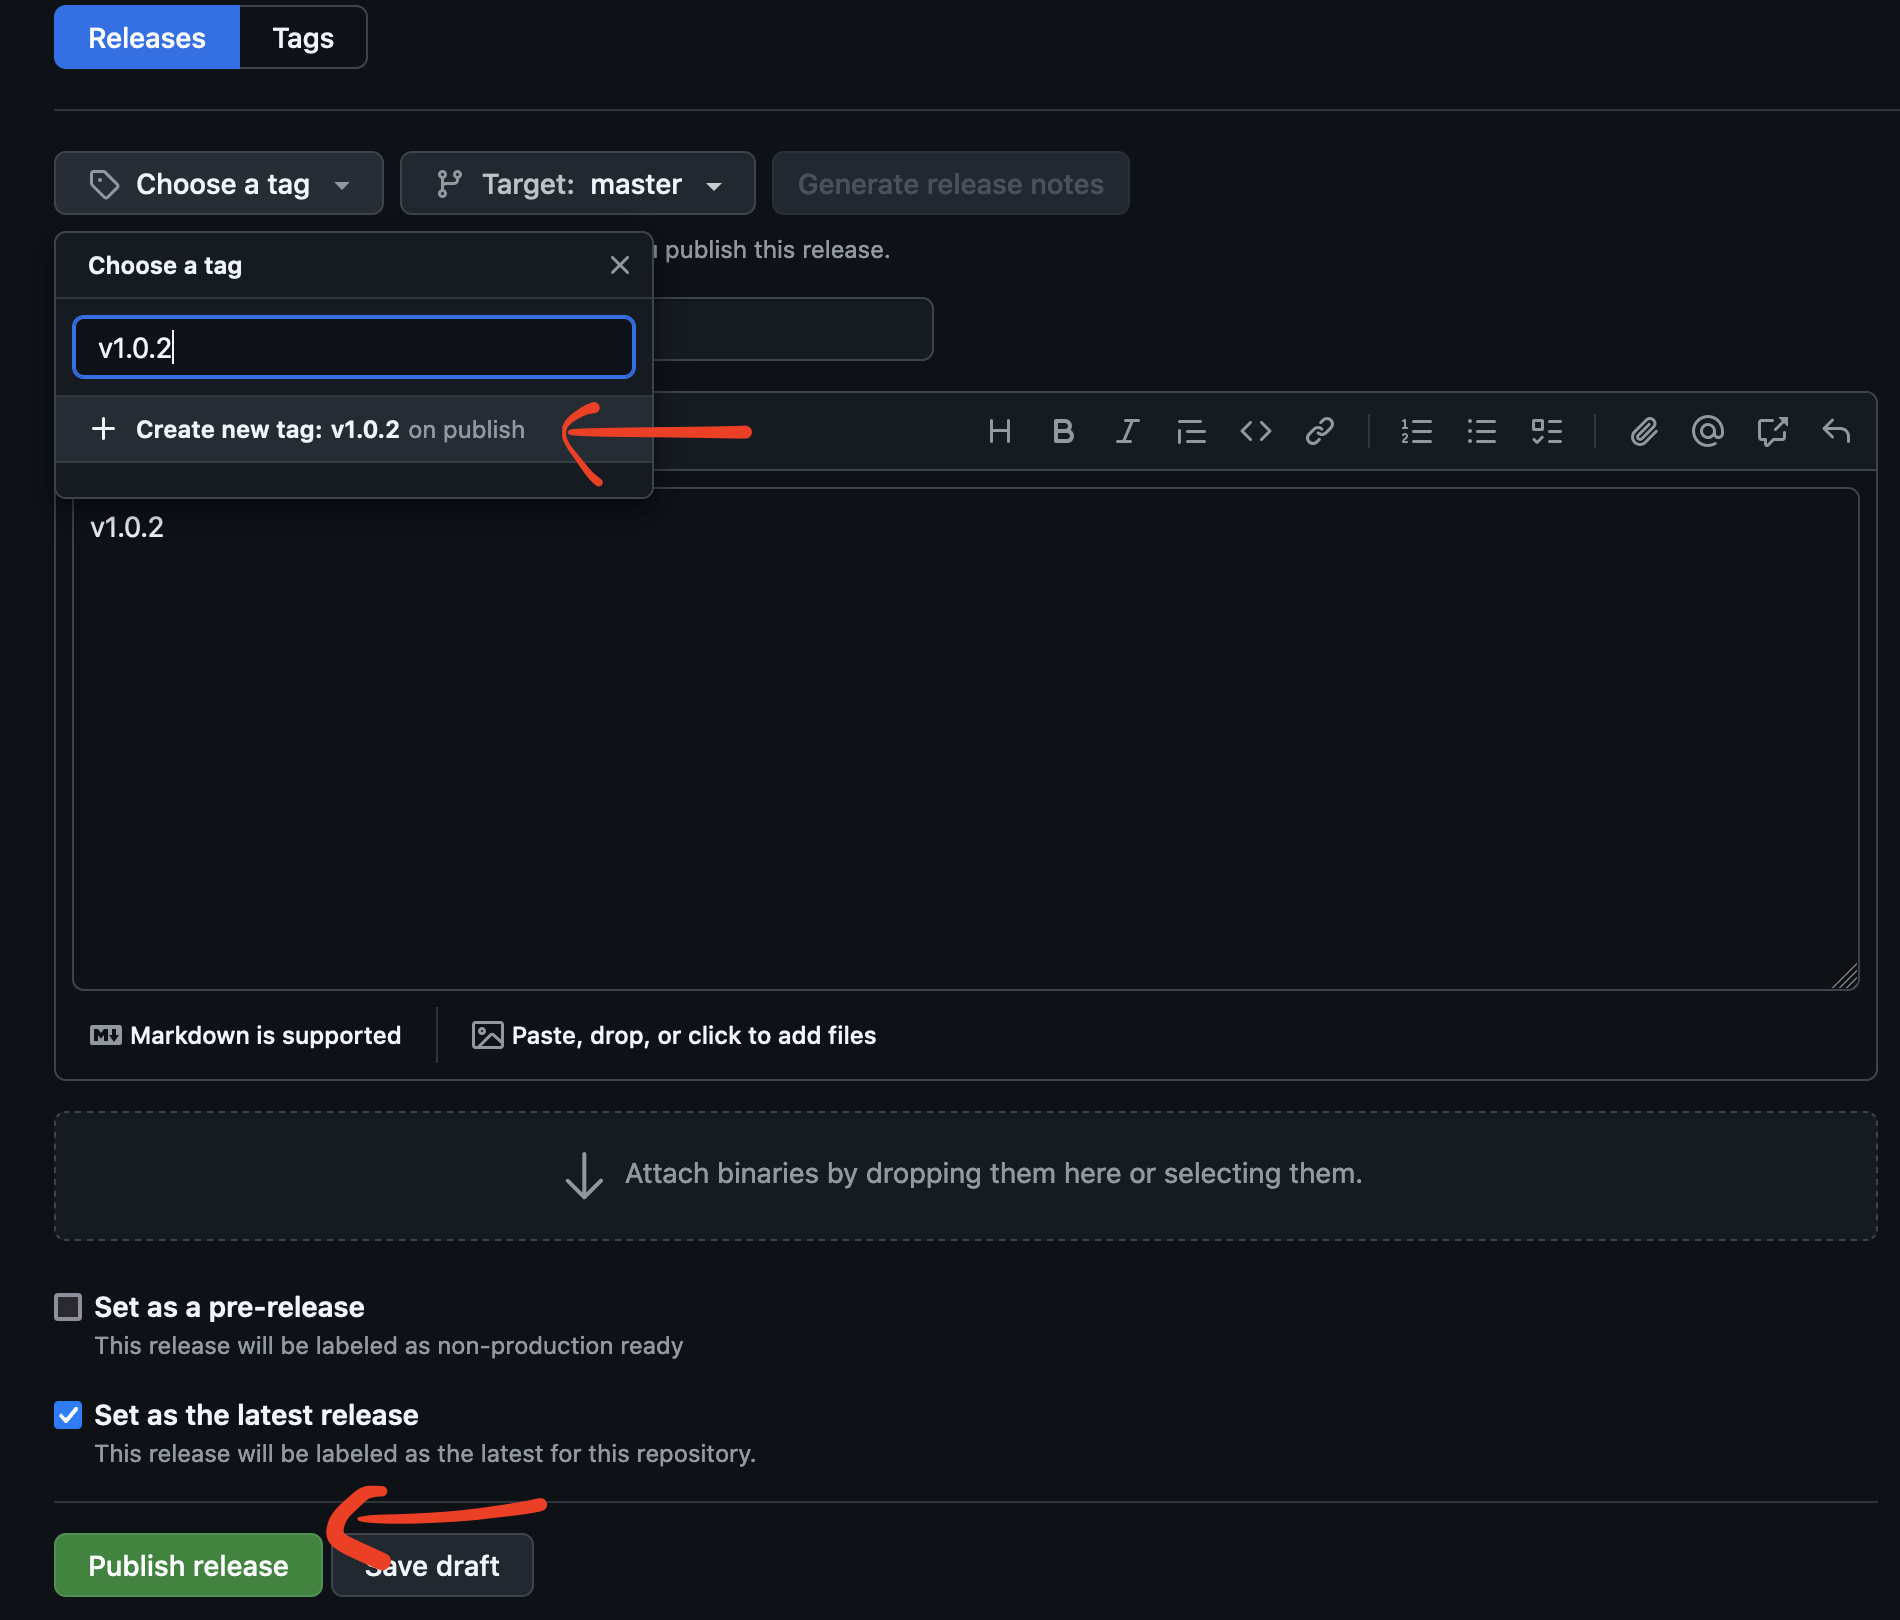
在module中写好代码后上传到github上,并在github上给项目打上tag

如果GitHub repository设置成public的话,此时就可以使用如下命令引用这个module了

1
2
3
4
➜  /Users/lintong/coding/go/gin-template git:(main) ✗ $ go get github.com/tonglin0325/go-test@latest
go: downloading github.com/tonglin0325/go-test v1.0.1
go: added github.com/tonglin0325/go-test v1.0.1

2.引用私有仓库的go module

如果电脑配置了github的私钥的话,可以直接使用go get命令来引用私有仓库的依赖

如果没有设置的话,则可以使用github的token来下载依赖

在github用户settings的Developer settings中创建一个token,token name假设为goland

指定go module的项目,并设置contents设置为read only

创建后获得token

重新设置github使用账号+token来拉取依赖

1
2
git config --global url."https://tonglin0325:your_token@github.com".insteadOf "https://github.com"

查看git配置是否添加成功

1
2
git config --global -l

如果添加错误可以unset之后再重新set

1
2
git config --global --unset xxx

指定拉取go-test依赖的时候使用私有仓库

1
2
go env -w GOPRIVATE=github.com/tonglin0325/go-test

查看go环境变量

1
2
go env

如果设置失败,可以删除后再添加

1
2
go env -u GOPRIVATE

最后使用go get命令引用依赖

1
2
go get github.com/tonglin0325/go-test@latest

全文 >>

k8s学习笔记——Istio和Kong

服务网格(Service Mesh)是一种用于处理微服务架构中服务间通信的基础设施层。它的主要作用是提供可靠的服务发现、负载均衡、故障恢复、指标监控和安全性,通常无需对服务代码进行大量修改。服务网格通过在每个服务实例旁边部署一个轻量级代理(sidecar)来实现这些功能。

1.Istio#

Istio 是一个开源的服务网格(Service Mesh),透明地层叠到现有的分布式应用程序之上。Istio 强大的功能提供了一种统一且更高效的方式来保护、连接和监控服务。Istio 是实现负载均衡、服务间身份验证和监控的途径——几乎无需修改服务代码。它为你提供:

  • 集群中服务间的安全通信,采用双向 TLS 加密,基于强身份的身份验证和授权
  • HTTP、gRPC、WebSocket 和 TCP 流量的自动负载均衡
  • 通过丰富的路由规则、重试、故障切换和故障注入对流量行为进行细粒度控制
  • 支持访问控制、速率限制和配额的可插拔策略层和配置 API
  • 集群内所有流量(包括集群入口和出口)的自动化指标、日志和跟踪

参考:https://istio.io/latest/docs/overview/what-is-istio/

Istio 的流量管理模型源于和服务一起部署的 Envoy 代理。 网格内服务发送和接收的所有 data plane 流量都经由 Envoy 代理, 这让控制网格内的流量变得异常简单,而且不需要对服务做任何的更改。

Envoy 是在 Istio 里使用的高性能代理,用于为所有服务网格里的服务调度进出的流量。

参考:https://istio.io/latest/zh/docs/concepts/traffic-management/

2.Kong#

Kong 提供了两个主要产品:Kong Gateway 和 Kuma。

Kong Gateway 是一个云原生 API 网关,专注于管理、配置和路由 API 请求。它提供了强大的插件系统,可以扩展其功能以实现身份验证、速率限制、日志记录等功能。Kong Gateway 主要用于处理进出 API 的流量,但它不具备完整的服务网格功能。

Kuma 是 Kong 开发的一个服务网格,旨在简化服务间通信的管理。Kuma 提供了服务网格的所有核心功能,包括服务发现、负载均衡、故障恢复、可观察性和安全性。Kuma 可以部署在多个环境中,包括 Kubernetes 和虚拟机。

k8s学习笔记——ingress

Ingress 提供从集群外部到集群内服务(service)的 HTTP 和 HTTPS 路由。 流量路由由 Ingress 资源所定义的规则来控制。

下面是 Ingress 的一个简单示例,可将所有流量都发送到同一 Service:

ingress-diagram

通过配置,Ingress 可为 Service 提供外部可访问的 URL、对其流量作负载均衡、 终止 SSL/TLS,以及基于名称的虚拟托管等能力。 Ingress 控制器 负责完成 Ingress 的工作,具体实现上通常会使用某个负载均衡器, 不过也可以配置边缘路由器或其他前端来帮助处理流量。

参考:https://kubernetes.io/zh-cn/docs/concepts/services-networking/ingress/

典型的Ingress 控制器有 ingress-nginxIstio Ingress(一个基于 Istio 的 Ingress 控制器),用于 Kubernetes 的 Kong Ingress 控制器(一个用来驱动 Kong Gateway 的 Ingress 控制器)

参考:https://kubernetes.io/zh-cn/docs/concepts/services-networking/ingress-controllers/

Presto学习笔记——Go客户端连接Presto

1.查询PrestoDB(facebook版本)

1.创建PrestoDB环境

使用docker创建presto测试环境

1
2
https://hub.docker.com/r/prestodb/presto/tags

拉取镜像

1
2
docker pull prestodb/presto:0.284

启动

1
2
docker run -p 8080:8080 -ti -v /Users/lintong/Downloads/config.properties:/opt/presto-server/etc/config.properties -v /Users/lintong/Downloads/jvm.config:/opt/presto-server/etc/jvm.config prestodb/presto:0.284

其中config.properties配置文件

1
2
3
4
5
6
7
8
coordinator=true
node-scheduler.include-coordinator=true
http-server.http.port=8080
query.max-memory=5GB
query.max-memory-per-node=1GB
discovery-server.enabled=true
discovery.uri=http://localhost:8080

jvm.config

1
2
3
4
5
6
7
8
9
10
-server
-Xmx4G
-XX:+UseG1GC
-XX:G1HeapRegionSize=32M
-XX:+UseGCOverheadLimit
-XX:+ExplicitGCInvokesConcurrent
-XX:+HeapDumpOnOutOfMemoryError
-XX:+ExitOnOutOfMemoryError
-Djdk.attach.allowAttachSelf=true

配置参考:https://github.com/prestodb/presto/tree/master/docker/etc

https://prestodb.github.io/docs/current/installation/deployment.html

访问localhost:8080

2.使用client连接PrestoDB

可以使用presto-go-client,官方文档

1
2
https://github.com/prestodb/presto-go-client

引入依赖

1
2
go get github.com/prestodb/presto-go-client/presto

go连接数据库使用的是database/sql,还需要额外引入具体数据库的driver,比如

presto的github.com/prestodb/presto-go-client/presto

mysql的github.com/go-sql-driver/mysql

impala的github.com/bippio/go-impala

查询presto代码

1
2
3
4
5
6
7
8
9
10
11
12
13
14
15
16
17
18
19
20
21
22
23
24
25
26
27
28
29
30
31
32
import (
"database/sql"
"fmt"
_ "github.com/prestodb/presto-go-client/presto"
)

func main() {
dsn := "http://user@localhost:8080?catalog=default&schema=test"
db, err := sql.Open("presto", dsn)
if err != nil {
fmt.Println(err)
}

rows, err := db.Query("SELECT name, age FROM foobar WHERE id=?")
if err != nil {
fmt.Println(err)
}
defer func() {
_ = db.Close()
}()
// 迭代结果行
for rows.Next() {
var col1 string
var col2 int
if err := rows.Scan(&col1, &col2); err != nil {
fmt.Println("扫描行失败:", err)
return
}
fmt.Println(col1, col2)
}
}

参考:golang+presto查询在数据平台中ad hoc查询

如果想同时查询多行的话,也可以先定义一个struct

1
2
3
4
5
6
7
type YourTable struct {
  Col1 string
  Col2 int
  Col3 float64
  // 其他列...
}

然后在迭代查询的时候使用这个struct

1
2
3
4
5
6
7
8
9
10
// 迭代结果行
for rows.Next() {
  var row YourTable
  if err := rows.Scan(&row.Col1, &row.Col2, &row.Col3); err != nil {
    fmt.Println("扫描行失败:", err)
    return
  }
  fmt.Println(row)
}

3.使用REST API连接PrestoDB

参考官方文档

1
2
https://prestodb.io/docs/current/develop/client-protocol.html

其实presto-go-client底层也是使用presto的REST API的POST请求来提交任务,参考源码

1
2
https://github.com/prestodb/presto-go-client/tree/master/presto#L635

2.查询Trino(社区版本)

1.创建Trino环境

创建Trino环境用于测试可以使用docker

1
2
https://hub.docker.com/r/trinodb/trino/tags

拉取镜像

1
2
docker pull trinodb/trino:435

启动

1
2
docker run -p 8080:8080 -ti trinodb/trino:435

访问localhost:8080,默认密码不启用,随便输入一个用户名

界面

2.使用client连接trino

可以使用trino-go-client,官方文档

1
2
https://github.com/trinodb/trino-go-client

引入依赖

1
2
go get github.com/trinodb/trino-go-client/trino

查询trino代码

1
2
3
4
5
6
7
8
9
10
11
12
13
14
15
16
17
18
import (
"database/sql"
"fmt"
)
import _ "github.com/trinodb/trino-go-client/trino"

func main() {
dsn := "http://user@localhost:8080?catalog=default&schema=test"
db, err := sql.Open("trino", dsn)
if err != nil {
fmt.Println(err)
}
defer func() {
_ = db.Close()
}()
db.Query("SELECT * FROM foobar WHERE id=?", 1, sql.Named("X-Trino-User", string("Alice")))
}

3.使用REST API连接TrinoDB

参考官方文档

1
2
https://trino.io/docs/current/develop/client-protocol.html

其实trino-go-client底层也是使用trino的REST API的POST请求来提交任务,参考源码

1
2
https://github.com/trinodb/trino-go-client/blob/master/trino/trino.go#L820

全文 >>

go学习笔记——wire依赖注入

wire是google开源的使用依赖注入来自动连接组件的代码生成工具

安装

1
2
go install github.com/google/wire/cmd/wire@latest

官方使用文档:

https://github.com/google/wire/blob/main/docs/guide.md

文档参考:

手把手,带你从零封装Gin框架(十二):使用 Wire 依赖注入重构

golang中的依赖注入之wire

参考项目:

https://github.com/jassue/gin-wire

如果遇到下面报错

1
2
3
4
wire: /xxx/cmd/server/wire.go:17:1: inject wireApp: unused provider set "ProviderSet"
wire: xx/cmd/server: generate failed
wire: at least one generate failure

这是因为设置了依赖注入的方法没能找到调用者,在gin项目中,调用的顺序一般是data层->service层->handler层->router层->httpserver->app

所以需要把调用的ProviderSet在wire.go文件中完整的写出来,不能出现中间中断的情况,wire_gen才能正常的生成

比如写了data,service,router,httpserver和app,但是漏了handler,这样就会报上面的错误

如果只写了router,httpserver和app,这样是可以正常生成的

可以参考:https://github.com/jassue/gin-wire/blob/main/cmd/app/wire_gen.go 中的调用层次

全文 >>

screen使用教程

在terminal上使用跳板机远程登录其他机器的时候,经常会因为和跳板机的连接断开而丢失会话,如下

这时候可以使用screen命令来创建和恢复会话

1.创建会话

1
2
3
4
screen 
或者
screen -S session_name

这时我们就进到了一个screen会话中,比如我们进到/tmp目录下

2.查看现有的会话

这时候我们把这个terminal窗口直接关闭掉,另外开启一个terminal,输入如下命令来查看现有的会话

1
2
screen -ls

会发现当前的会话仍然存在,处于分离状态

3.恢复会话

1
screen -r session_name

会发现我们刚才的/tmp目录的会话就被恢复了

参考:Linux–screen远程必备 #screen常用命令-会话的创建、恢复、删除(&重命名删除)用法

go学习笔记——常用命令

1.查找go依赖

go依赖可以去下面网站查找package

1
2
https://pkg.go.dev/

比如

1
2
https://pkg.go.dev/github.com/confluentinc/confluent-kafka-go#section-readme

2.go切换源

1
2
3
4
5
6
7
# 启用 Go Modules 功能
go env -w GO111MODULE=on
# 切换源
go env -w GOPROXY=https://goproxy.io,direct
# 确认是否生效
go env

3.安装指定依赖

1
2
3
go get -u github.com/confluentinc/confluent-kafka-go/kafka
go get: added github.com/confluentinc/confluent-kafka-go v1.9.2

如果想安装特定版本的依赖

1
2
go get github.com/confluentinc/confluent-kafka-go/kafka@v1.9.2

4.下载依赖

1
2
go mod download

5.清理无用的依赖

下载缺失依赖,并清理无用的依赖(包括清理 go.mod 中的记录)

1
2
go mod tidy

go.mod文件中就会出现所安装的依赖

参考:真官方依赖管理 Go Modules 怎么玩(从入门到放弃)

6.在项目根目录下会生成go.mod文件

1
2
go mod init [模块名]

全文 >>

go学习笔记——gin框架

gin是一款轻量级的go web开发框架,官方文档

1
2
https://gin-gonic.com/docs/examples/

1.gin web项目结构

参考

1
2
https://github.com/voyagegroup/gin-boilerplate

gin+protobuf wire参考

1
2
https://github.com/mohuishou/blog-code/tree/main/01-go-training/04-project/10-layout

2.gin web quick start

1
2
https://gin-gonic.com/docs/quickstart/

在官方文档中提供了2个quick start的demo,一个稍微复杂,一个比较简单

简单的例子如下,创建一个/ping接口,返回pong

1
2
3
4
5
6
7
8
9
10
11
12
13
14
package main

import "github.com/gin-gonic/gin"

func main() {
r := gin.Default()
r.GET("/ping", func(c *gin.Context) {
c.JSON(200, gin.H{
"message": "pong",
})
})
r.Run() // listen and serve on 0.0.0.0:8080
}

3.路由分组

如果gin项目的接口比较多的话,可以使用路由分组

1
2
https://gin-gonic.com/docs/examples/grouping-routes/

参考:【Go】基于 Gin 从0到1搭建 Web 管理后台系统后端服务(三)路由、自定义校验器和 Redis

4.数据绑定

将请求的参数传递给接口中的变量,需要使用gin的数据绑定

如果是path parameter

使用c.Param(“name”)

1
2
https://gin-gonic.com/docs/examples/param-in-path/

使用c.ShouldBindUri(&person)

1
2
https://gin-gonic.com/docs/examples/bind-uri/

如果是query parameter或者post请求的form-data

使用c.ShouldBind(&user)

1
2
https://gin-gonic.com/docs/examples/bind-query-or-post/

5.统一的response

可以如下定义统一的接口response,其中的interface{}类似java中的泛型T

1
2
3
4
5
6
7
8
9
10
11
12
13
14
15
16
17
18
19
20
type ControllerResponse struct {
Code int
Msg string
Data interface{}
}

func Response(ctx *gin.Context, code int, msg string, data interface{}) {
resp := ControllerResponse{Code: code, Msg: msg, Data: data}
ctx.JSON(code, resp)
ctx.Abort()
}

func Success(ctx *gin.Context, msg string, data interface{}) {
Response(ctx, 200, msg, data)
}

func Fail(ctx *gin.Context, msg string, data interface{}) {
Response(ctx, 500, msg, data)
}

参考:go语言web开发系列之十五:gin框架统一定义API错误码

6.Gin的middleware中间件

1.使用middleware

gin的middleware需要实现gin.HandlerFunc,可以用其来实现诸如jwt,auth等功能,参考

https://github.com/gin-gonic/contrib/blob/master/jwt/jwt.go

https://gin-gonic.com/zh-cn/docs/examples/using-middleware/

下面定义了3个middleware

1
2
3
4
5
6
7
8
9
10
11
12
13
14
15
16
17
18
19
20
21
22
23
24
25
26
27
// MiddleWare1 定义中间件1
func MiddleWare1() gin.HandlerFunc {
return func(c *gin.Context) {
fmt.Println("前 m1")
c.Next()
fmt.Println("后 m1")
}
}

// MiddleWare2 定义中间件2
func MiddleWare2() gin.HandlerFunc {
return func(c *gin.Context) {
fmt.Println("前 m2")
c.Next()
fmt.Println("后 m2")
}
}

// MiddleWare3 定义中间件3
func MiddleWare3() gin.HandlerFunc {
return func(c *gin.Context) {
fmt.Println("前 m3")
c.Next()
fmt.Println("后 m3")
}
}

在gin中添加middleware

1
2
3
4
5
6
7
8
9
10
11
12
13
14
15
16
17
18
func main() {
// 创建路由
engine := gin.Default()

// 注册中间件
engine.Use(MiddleWare1(), MiddleWare2(), MiddleWare3())

// 路由规则
engine.GET("/ping", func(c *gin.Context) {
fmt.Println("hello world")
c.JSON(200, gin.H{"msg": "pong"})
})
err:=engine.Run(":3000")
if err != nil {
fmt.Println(err)
}
}

输出如下

1
2
3
4
5
6
7
8
9
前 m1
前 m2
前 m3
hello world
后 m3
后 m2
后 m1
[GIN] 2023/12/25 - 00:06:11 | 200 | 35.726µs | 127.0.0.1 | GET "/ping"

接口返回pong

2.Next()和Abort()

Next()之前的代码会在执行HandlerFunc之前执行,之后的代码会在执行HandlerFunc之后执行

如果将middleware2中的c.Next()修改成c.Abort()

1
2
3
4
5
6
7
8
9
// MiddleWare2 定义中间件2
func MiddleWare2() gin.HandlerFunc {
return func(c *gin.Context) {
fmt.Println("前 m2")
c.Abort()
fmt.Println("后 m2")
}
}

则输出将会如下

1
2
3
4
5
6
前 m1
前 m2
后 m2
后 m1
[GIN] 2023/12/25 - 00:11:05 | 200 | 16.262µs | 127.0.0.1 | GET "/ping"

接口无返回

可以Abort()不会阻止当前middleware的执行,但是会中止下游middleware以及HandlerFunc的执行

参考:[Go Package] gin 中间件流程控制:c.Next() / c.Abort()

3.全局中间件和局部中间件

1.白名单

上面给出的例子中,middleware将对全部的请求生效,这里可以通过指定白名单的方法来使其只对部分请求生效

2.局部中间件

参考:Golang Gin 局部、全局 中间件使用

7.在Gin中使用http handler中间件

除了使用gin的middleware来实现中间件之外,也可以使用Go的标准库的net/http包来初始http请求

参考:GO中间件(Middleware)

在gin中使用的话,需要将http.Handler转换成gin.HanlderFunc

1
2
3
4
5
6
7
8
9
10
11
12
13
14
15
16
17
// MiddleWare4 定义中间件4
func MiddleWare4(next http.Handler) http.Handler {
return http.HandlerFunc(func(writer http.ResponseWriter, request *http.Request) {
fmt.Println("前 m4")
next.ServeHTTP(writer, request)
fmt.Println("后 m4")
})
}

// 将 http.Handler 包装成 Gin 中间件的函数
func WrapHandler(handler http.Handler) gin.HandlerFunc {
return func(c *gin.Context) {
handler.ServeHTTP(c.Writer, c.Request)
c.Next()
}
}

在router中添加middleware,注意需要将middleware写在局部路由的前面才能生效

1
2
3
4
5
6
7
8
9
10
wrappedMiddleware := middleware.WrapHandler(middleware.MiddleWare4(http.HandlerFunc(func(w http.ResponseWriter, r *http.Request) {
// 空的 http.HandlerFunc,只为了包装中间件
})))
r.Use(wrappedMiddleware, middleware.MiddleWare1(), middleware.MiddleWare2())

// Ping test
r.GET("/ping", func(c *gin.Context) {
c.String(http.StatusOK, "pong")
})

参考:https://github.com/go-kratos/examples/blob/main/http/middlewares/middlewares.go

全文 >>

go学习笔记——Kratos框架

官方文档

1
2
https://go-kratos.dev/en/docs/getting-started/start/

1.安装Go

参考:mac安装go1.20

2.安装Kratos框架

kratos依赖protobuf grpc等框架,需要先进行安装

1
2
3
4
5
brew install grpc
brew install protobuf
brew install protoc-gen-go
brew install protoc-gen-go-grpc

验证

1
2
3
4
protoc --version
protoc-gen-go --version
protoc-gen-go-grpc --version

安装kratos框架

1
2
go install github.com/go-kratos/kratos/cmd/kratos/v2@latest

3.创建项目

1
2
3
4
5
# 创建项目
kratos new helloworld
# 也可以指定仓库
kratos new helloworld -r https://gitee.com/go-kratos/kratos-layout.git

编译项目

1
2
3
4
5
6
7
8
9
10
11
12
13
14
15
16
17
18
19
20
21
22
23
24
cd helloworld

# 安装依赖
make init

# 生成wire依赖注入
go generate ./...
# 或者使用make
make generate

# 生成bin执行文件
go build -o ./bin/ ./...
# 或者使用make
make build

# 运行
./bin/helloworld -conf ./configs
或者
kratos run

# 测试
curl 'http://127.0.0.1:8000/helloworld/kratos'
{"message":"Hello kratos"}%

项目结构

Kratos项目如果想要使用debug模式来运行

需要将run kind从File修改成Directory,并指定Directory为main.go和wire_gen.go所在的目录,否则会报

1
2
3
# command-line-arguments
./main.go:77:23: undefined: wireApp

同时还需要额外指定conf文件的路径,否则会报

1
2
panic: stat ../../configs: no such file or directory

配置如下

1
2
-conf ./configs/config.yaml

其中config.yaml的路径是相对于Working directory的,如果有多个config文件,也可以写文件夹,比如

1
2
-conf ./configs

或者修改成package,指定成package path

debug成功

如果想要添加额外的API,需要先添加proto文件

1
2
kratos proto add api/helloworld/demo.proto

编译proto文件生成model和grpc代码

1
2
kratos proto client api/helloworld/demo/demo.proto

或者使用make命令

1
2
make api

注意make api命令无法生成validate验证代码,需要额外使用make validate命令,但是kratos proto client命令是可以的

参考:https://go-kratos.dev/docs/component/middleware/validate/

生成service模板代码

1
2
kratos proto server api/helloworld/demo/demo.proto -t internal/service

参考文档:从0到1安装启动Kratos框架https://go-kratos.dev/en/docs/getting-started/usage

4.Example项目

1
2
https://github.com/go-kratos/examples

5.Middleware

区别于gin的middleware实现的是gin.HandlerFunc以及在gin中基于http.Handler的实现,参考:

全文 >>