tonglin0325的个人主页

使用filebeat发送nginx日志到kafka

1.配置filebeat_nginx.yml

1
2
3
4
5
6
7
8
9
10
11
12
13
14
15
16
17
18
19
20
21
filebeat.modules:
- module: nginx
access:
enabled: true
var.paths: ["/var/log/nginx/access.log*"]
error:
enabled: true
var.paths: ["/var/log/nginx/error.log*"]

#----------------------------------Kafka output--------------------------------#
output.kafka:
version: "1.0.1"
enabled: true
hosts: ['xxx:9092', 'xxx:9092', 'xxx:9092']
topic: 'temp'
required_acks: 1 #default
compression: gzip #default
max_message_bytes: 1000000 #default
codec.format:
string: '%{[message]}'

2.启动filebeat

1
2
./filebeat -e -c filebeat_nginx.yml

3.访问nginx

1
2
tail -f /var/log/nginx/access.log

日志文件输出

1
2
3
4
5
6
{"ts":"2019-10-14 10:53:22","host":"127.0.0.1","clientip":"127.0.0.1","size":0,"responsetime":0.000,"upstreamtime":"-","upstreamhost":"-","http_host":"localhost","url":"/index.html","domain":"localhost","xff":"-","referer":"-","status":"304"}
{"ts":"2019-10-14 10:53:23","host":"127.0.0.1","clientip":"127.0.0.1","size":0,"responsetime":0.000,"upstreamtime":"-","upstreamhost":"-","http_host":"localhost","url":"/index.html","domain":"localhost","xff":"-","referer":"-","status":"304"}
{"ts":"2019-10-14 10:53:30","host":"127.0.0.1","clientip":"127.0.0.1","size":0,"responsetime":0.000,"upstreamtime":"-","upstreamhost":"-","http_host":"localhost","url":"/index.html","domain":"localhost","xff":"-","referer":"-","status":"304"}
{"ts":"2019-10-14 10:53:31","host":"127.0.0.1","clientip":"127.0.0.1","size":0,"responsetime":0.000,"upstreamtime":"-","upstreamhost":"-","http_host":"localhost","url":"/index.html","domain":"localhost","xff":"-","referer":"-","status":"304"}

kafka输出

1
2
3
4
5
6
{"ts":"2019-10-14 10:53:23","host":"127.0.0.1","clientip":"127.0.0.1","size":0,"responsetime":0.000,"upstreamtime":"-","upstreamhost":"-","http_host":"localhost","url":"/index.html","domain":"localhost","xff":"-","referer":"-","status":"304"}
{"ts":"2019-10-14 10:53:22","host":"127.0.0.1","clientip":"127.0.0.1","size":0,"responsetime":0.000,"upstreamtime":"-","upstreamhost":"-","http_host":"localhost","url":"/index.html","domain":"localhost","xff":"-","referer":"-","status":"304"}
{"ts":"2019-10-14 10:53:30","host":"127.0.0.1","clientip":"127.0.0.1","size":0,"responsetime":0.000,"upstreamtime":"-","upstreamhost":"-","http_host":"localhost","url":"/index.html","domain":"localhost","xff":"-","referer":"-","status":"304"}
{"ts":"2019-10-14 10:53:31","host":"127.0.0.1","clientip":"127.0.0.1","size":0,"responsetime":0.000,"upstreamtime":"-","upstreamhost":"-","http_host":"localhost","url":"/index.html","domain":"localhost","xff":"-","referer":"-","status":"304"}

全文 >>

由crt和key文件生成keystore文件

该图转自知乎 海棠依旧


1.先生成p12文件,生成的时候需要指定密码

1
2
openssl pkcs12 -export -in your_crt.crt -inkey your_key.key -out your_p12.p12

2.再生成keystore文件

1
2
keytool -importkeystore -v  -srckeystore your_p12.p12 -srcstoretype pkcs12 -srcstorepass 你设置的密码 -destkeystore your_keystore.keystore -deststoretype jks -deststorepass 你设置的密码

3.然后就能使用这个keystore文件和密码来进行https的请求


参考

1
2
https://blog.csdn.net/u013944791/article/details/73551253

全文 >>

Nginx修改时间戳

1.安装nginx,注意不要安装nginx-full

1
2
3
4
sudo apt-get install nginx
sudo apt-get install nginx-common
sudo apt-get install nginx-extras

确认版本

1
2
3
4
5
6
7
8
apt list --installed | grep nginx

WARNING: apt does not have a stable CLI interface. Use with caution in scripts.

nginx/xenial-updates,xenial-updates,xenial-security,xenial-security,now 1.10.3-0ubuntu0.16.04.4 all [已安装]
nginx-common/xenial-updates,xenial-updates,xenial-security,xenial-security,now 1.10.3-0ubuntu0.16.04.4 all [已安装]
nginx-extras/xenial-updates,xenial-security,now 1.10.3-0ubuntu0.16.04.4 amd64 [已安装]

2.修改配置 /etc/nginx/nginx.conf

1
2
3
4
5
6
7
8
9
10
11
12
13
14
15
16
17
18
19
20
21
22
23
24
25
26
27
28
29
30
31
32
33
34
35
36
37
38
39
40
41
42
43
44
45
46
47
48
49
50
51
52
53
54
55
56
57
58
59
60
61
62
63
64
65
66
67
68
69
70
71
72
73
74
75
76
77
78
79
80
81
82
83
84
85
86
87
88
89
90
http {

##
# Basic Settings
##

sendfile on;
tcp_nopush on;
tcp_nodelay on;
keepalive_timeout 65;
types_hash_max_size 2048;
# server_tokens off;

# server_names_hash_bucket_size 64;
# server_name_in_redirect off;

include /etc/nginx/mime.types;
default_type application/octet-stream;

##
# SSL Settings
##

ssl_protocols TLSv1 TLSv1.1 TLSv1.2; # Dropping SSLv3, ref: POODLE
ssl_prefer_server_ciphers on;

##
# Logging Settings
##

# access_log /var/log/nginx/access.log;
error_log /var/log/nginx/error.log;

##
# Gzip Settings
##

gzip on;
gzip_disable "msie6";

# gzip_vary on;
# gzip_proxied any;
# gzip_comp_level 6;
# gzip_buffers 16 8k;
# gzip_http_version 1.1;
# gzip_types text/plain text/css application/json application/javascript text/xml application/xml application/xml+rss text/javascript;

##
# Virtual Host Configs
##

include /etc/nginx/conf.d/*.conf;
include /etc/nginx/sites-enabled/*;

server {
listen 80;
server_name localhost;
location / {
root html;
index index.html index.htm;
}
}

log_format access_json '{"ts":"$fmt_localtime",'
'"schema":"com.xxx.xxx",'
'"host":"$server_addr",'
'"clientip":"$remote_addr",'
'"size":$body_bytes_sent,'
'"responsetime":$request_time,'
'"upstreamtime":"$upstream_response_time",'
'"upstreamhost":"$upstream_addr",'
'"http_host":"$host",'
'"url":"$uri",'
'"domain":"$host",'
'"xff":"$http_x_forwarded_for",'
'"referer":"$http_referer",'
'"status":"$status"}';

access_log /var/log/nginx/access.log access_json;

map $host $fmt_localtime {
default '';
}

log_by_lua_block {
ngx.var.fmt_localtime = ngx.localtime();
}

}

3.输出的日志

1
2
3
{"ts":"2019-10-13 22:59:48","schema":"com.xxx.xxx","host":"127.0.0.1","clientip":"127.0.0.1","size":0,"responsetime":0.000,"upstreamtime":"-","upstreamhost":"-","http_host":"localhost","url":"/index.html","domain":"localhost","xff":"-","referer":"-","status":"304"}


Nginx打印json日志

1.修改配置,在http{}中添加

1
2
3
4
5
6
7
8
9
10
11
12
13
14
15
log_format access_json '{"@timestamp":"$time_iso8601",'
'"host":"$server_addr",'
'"clientip":"$remote_addr",'
'"size":$body_bytes_sent,'
'"responsetime":$request_time,'
'"upstreamtime":"$upstream_response_time",'
'"upstreamhost":"$upstream_addr",'
'"http_host":"$host",'
'"url":"$uri",'
'"domain":"$host",'
'"xff":"$http_x_forwarded_for",'
'"referer":"$http_referer",'
'"status":"$status"}';
access_log /var/log/nginx/access.log access_json;


 2.重启

1
2
systemctl restart nginx

或者

1
2
nginx -s reload

3.访问,输出日志

1
2
{"@timestamp":"2019-10-12T18:41:48+08:00","host":"127.0.0.1","clientip":"127.0.0.1","size":0,"responsetime":0.000,"upstreamtime":"-","upstreamhost":"-","http_host":"localhost","url":"/index.html","domain":"localhost","xff":"-","referer":"-","status":"304"}

全文 >>

Nginx添加静态页面

1.编辑配置文件

1
2
sudo vim  /etc/nginx/nginx.conf

在http {}中添加如下

1
2
3
4
5
6
7
8
9
server {
listen 80;
server_name localhost;
location / {
root html;
index index.html index.htm;
}
}


2.重启nginx

1
2
systemctl restart nginx

3.访问,成功

1
2
localhost:80/index.html

全文 >>

Ubuntu16.04安装nginx

1.安装

1
2
sudo apt-get install nginx

2.启动

1
2
systemctl start nginx.service

如果和apache2的80端口冲突了,修改一下apache2的port

1
2
sudo vim /etc/apache2/ports.conf

冲突的话,日志/var/log/nginx/error.log中将会报

1
2
2019/10/12 14:25:31 [emerg] 23836#23836: listen() to 0.0.0.0:80, backlog 511 failed (98: Address already in use)

修改成8080

全文 >>

Nexus上传python包

参考

1
2
https://blog.csdn.net/m0_37607365/article/details/79998955

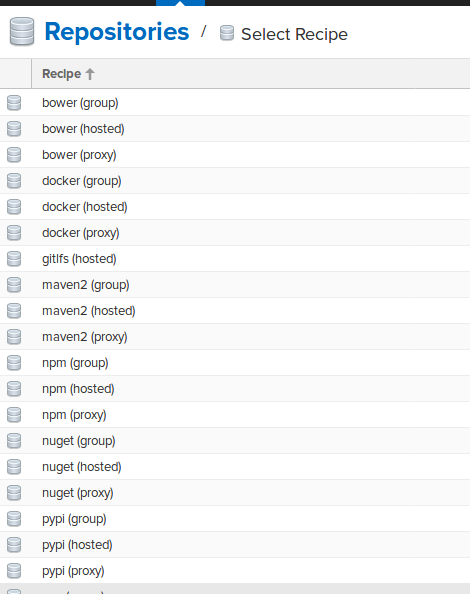
1.首先创建pypi仓库


其中,PyPI类的服务,支持三种:     

proxy,提供代理服务

hosted,提供私有包的发布服务

全文 >>

Hive学习笔记——parser

Hive是如何解析SQL的呢,首先拿hive的建表语句来举例,比如下面的建表语句

1
2
create table test(id int,name string)row format delimited fields terminated by '\t';

然后使用hive的show create table语句来查看创建的表结构,这是一张text表

1
2
3
4
5
6
7
8
9
10
11
12
13
14
15
16
17
CREATE TABLE `test`(
`id` int,
`name` string)
ROW FORMAT SERDE
'org.apache.hadoop.hive.serde2.lazy.LazySimpleSerDe'
WITH SERDEPROPERTIES (
'field.delim'='\t',
'serialization.format'='\t')
STORED AS INPUTFORMAT
'org.apache.hadoop.mapred.TextInputFormat'
OUTPUTFORMAT
'org.apache.hadoop.hive.ql.io.HiveIgnoreKeyTextOutputFormat'
LOCATION
'hdfs://master:8020/user/hive/warehouse/test'
TBLPROPERTIES (
'transient_lastDdlTime'='1568561230')

当然还有其他各种建表语句,比如

csv表

1
2
3
4
5
6
7
8
9
10
11
12
13
14
15
16
17
18
19
20
21
22
23
CREATE EXTERNAL TABLE `default.test_1`(
`key` string COMMENT 'from deserializer',
`value` string COMMENT 'from deserializer')
ROW FORMAT SERDE
'org.apache.hadoop.hive.serde2.OpenCSVSerde'
WITH SERDEPROPERTIES (
'escapeChar'='\\',
'quoteChar'='\'',
'separatorChar'='\t')
STORED AS INPUTFORMAT
'org.apache.hadoop.mapred.TextInputFormat'
OUTPUTFORMAT
'org.apache.hadoop.hive.ql.io.HiveIgnoreKeyTextOutputFormat'
LOCATION
'hdfs://master:8020/user/hive/warehouse/test'
TBLPROPERTIES (
'COLUMN_STATS_ACCURATE'='false',
'numFiles'='0',
'numRows'='-1',
'rawDataSize'='-1',
'totalSize'='0',
'transient_lastDdlTime'='xxxx')

 parquet表

1
2
3
4
5
6
7
8
9
10
11
12
13
14
15
16
17
18
19
20
CREATE TABLE `default.test`(
`time` string,
`server` int,
`id` bigint)
PARTITIONED BY (
`ds` string)
ROW FORMAT SERDE
'org.apache.hadoop.hive.ql.io.parquet.serde.ParquetHiveSerDe'
WITH SERDEPROPERTIES (
'field.delim'='\t',
'serialization.format'='\t')
STORED AS INPUTFORMAT
'org.apache.hadoop.hive.ql.io.parquet.MapredParquetInputFormat'
OUTPUTFORMAT
'org.apache.hadoop.hive.ql.io.parquet.MapredParquetOutputFormat'
LOCATION
'hdfs://master:8020/user/hive/warehouse/test'
TBLPROPERTIES (
'transient_lastDdlTime'='xxxx')

 json表

全文 >>

Ubuntu16.04安装Supervisor

安装

1
2
sudo apt-get install supervisor 

启动,否则会报 unix:///tmp/supervisor.sock no such file

1
2
service supervisor start

或者

1
2
supervisord -c /etc/supervisor/supervisord.conf

 生成配置文件

1
2
echo_supervisord_conf > /etc/supervisor/supervisord.conf

注意里面的注释去掉

1
2
3
4
5
[inet_http_server]         ; inet (TCP) server disabled by default
port=127.0.0.1:9001 ; (ip_address:port specifier, *:port for all iface)
username=user ; (default is no username (open server))
password=123 ; (default is no password (open server))

全文 >>

Hive学习笔记——metadata

Hive结构体系

1
2
https://blog.csdn.net/zhoudaxia/article/details/8855937

依赖

1
2
3
4
5
6
7
8
9
10
11
12
13
14
15
16
17
18
19
20
21
22
23
24
<dependency>
<groupId>org.apache.hadoop</groupId>
<artifactId>hadoop-client</artifactId>
<version>2.6.0</version>
<scope>provided</scope>
</dependency>
<dependency>
<groupId>org.apache.hive</groupId>
<artifactId>hive-exec</artifactId>
<version>1.1.0</version>
<scope>provided</scope>
</dependency>
<dependency>
<groupId>org.apache.hive</groupId>
<artifactId>hive-metastore</artifactId>
<version>1.1.0</version>
<scope>provided</scope>
</dependency>
<dependency>
<groupId>org.apache.hive</groupId>
<artifactId>hive-jdbc</artifactId>
<version>1.1.0</version>
</dependency>

有2种方法可以取得hive的元数据

**1.使用hive的jdbc接口**的getMetaData方法来获取hive表的相关元信息

1
2
3
4
5
6
7
import java.sql.*;

Class.forName("org.apache.hive.jdbc.HiveDriver");
Connection connection = DriverManager.getConnection("jdbc:hive2://xxxxx:10000", "xxxx", "xxxx");
Statement statement = connection.createStatement();
DatabaseMetaData meta = connection.getMetaData();

参考

1
2
https://blog.csdn.net/u010368839/article/details/76358831

hive metadata源码解析可以参考

1
2
https://cloud.tencent.com/developer/article/1330250

hive thrift接口可以参考

全文 >>