参考
1 | https://github.com/lupingqiu/metadata-scala-play |
在project文件夹下添加
build.properties
1 | sbt.version=1.2.1 |
plugins.sbt
1 | // The Typesafe repository |
运行
1 | sbt |
参考
1 | https://github.com/lupingqiu/metadata-scala-play |
在project文件夹下添加
build.properties
1 | sbt.version=1.2.1 |
plugins.sbt
1 | // The Typesafe repository |
运行
1 | sbt |
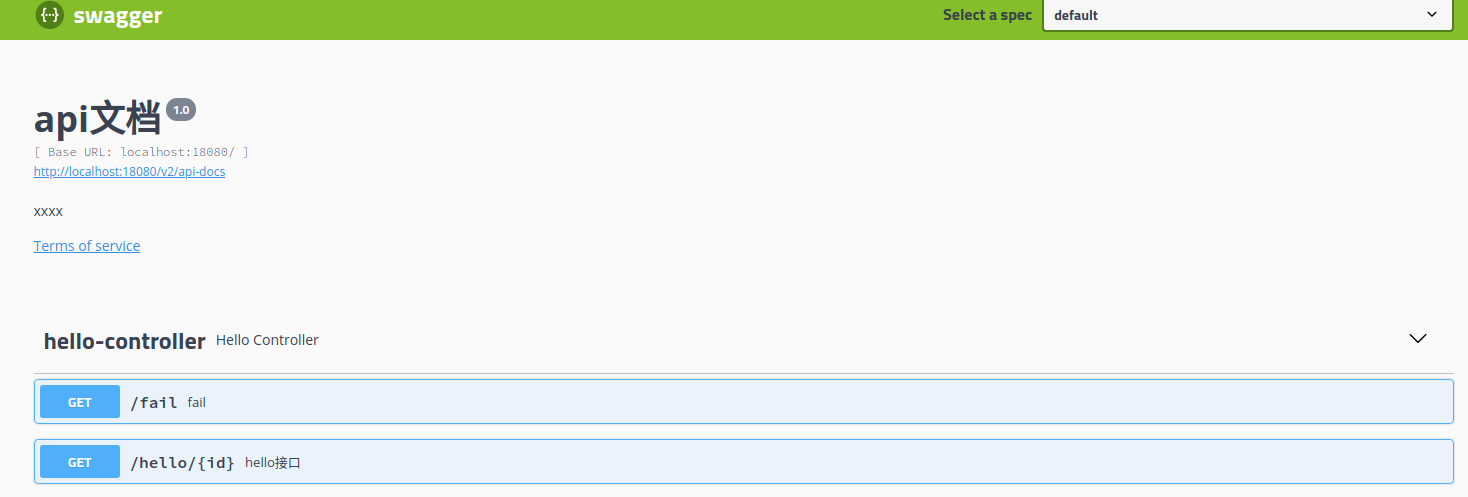
swagger-ui用于给API添加文档,还支持API的请求调用,可以降低前后端联调的沟通成本
1.依赖
1 | <!-- swagger2 --> |
2.配置swagger,注意修改basePackage成实际的包名
1 | import org.springframework.context.annotation.Bean; |
3.给controller添加 ApiOperation 注解
1 | @ApiOperation(value = "hello接口", notes = "取得id,打印hello") |
4.测试

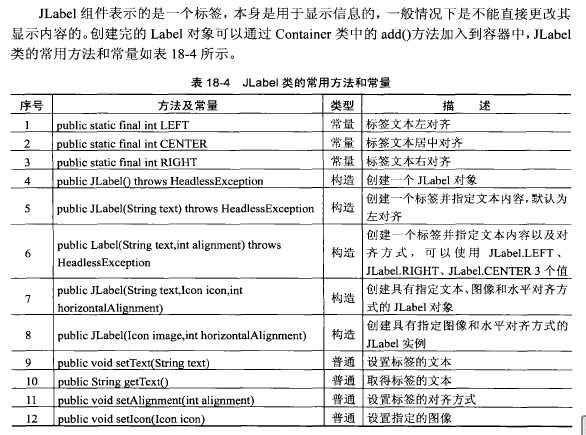
使用一个标签
1 | import java.awt.Color; |
更改JLabel的文本样式

设置标签的显示字体、大小、背景颜色
1 | import java.awt.Color; |
PreparedStatement接口是Statement的子接口,属于预处理操作,与直接使用Statement不同的是,PreparedStatement在操作时,是先在数据表中准备好了一条SQL语句,但是此SQL语句的具体内容暂时不设置,而是之后再进行设置。


使用PreparedStatement完成数据的增加和查询操作
1 | import java.sql.*; |
模糊查询
1 | import java.sql.*; |

使用SQL中的SELECT语句可以查询出数据库的全部结果,在JDBC的操作中数据库的所有查询记录将使用ResultSet进行接收,并使用ResultSet显示内容。

从user表中查询数据
1 | import java.sql.*; |
连接数据库


1 | import java.sql.*; |

建立一个user表
1 | CREATE TABLE user(id INT PRIMARY KEY AUTO_INCREMENT,name VARCHAR(30) NOT NULL,password VARCHAR(32) NOT NULL,age INT NOT NULL,sex VARCHAR(2),birthday DATE); |
<1>数据库的更新操作

执行数据库插入操作,执行一次插入一条
1 | import java.sql.*; |
1 | https://archive.apache.org/dist/avro/avro-1.10.1/java/ |
avro-tools.jar常用命令:Working with Apache Avro files in Amazon S3
也可以查看help
1 | java -jar ./avro-tools-1.10.1.jar help |
1 | java -jar ./avro-tools-1.10.1.jar getschema ./xxxx.avro |
1 | java -jar ./avro-tools-1.10.1.jar tojson ./nova_ads_access_log-0-0008589084.avro | less |
编译avro IDL文件,参考
1 | https://avro.apache.org/docs/current/gettingstartedjava.html |
定义schema文件kst.avsc
1 | { |
进入impala shell,port为Impala Daemon Beeswax 端口
1 | impala-shell -i ip:port -k |
使用impala shell直接运行SQL
1 | impala-shell -i ip:port -k --quiet -B -d default -q "select count(*) from table1 where ds='2021-01-20'" |
退出
1 | exit; |
1 | sudo apt-get update |
1 | sudo service mysql restart |
1 | sudo apt-get install libapache2-mod-auth-mysql |
16.04使用下面命令
1 | sudo apt-get install libmysqlclient-dev |
1 | mysql -u root -p |
如果修改了配置文件my.cnf配置文件,需要重启数据库(修改方法在下面),重启数据库之前需要先重新载入apparmor配置文件,使用下面命令重新载入:
1 | sudo /etc/init.d/apparmor restart |
重新启动数据库
1 | sudo /etc/init.d/mysql start |
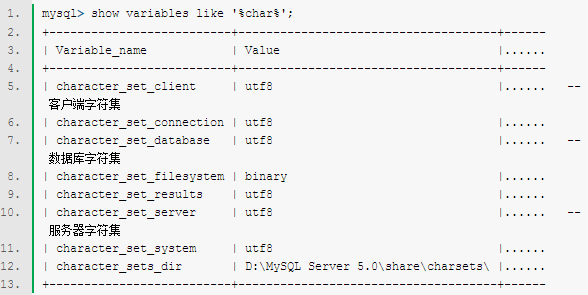
1.查看MySQL数据库服务器和数据库MySQL字符集。
1 | SHOW VARIABLES LIKE 'character_set_%'; |
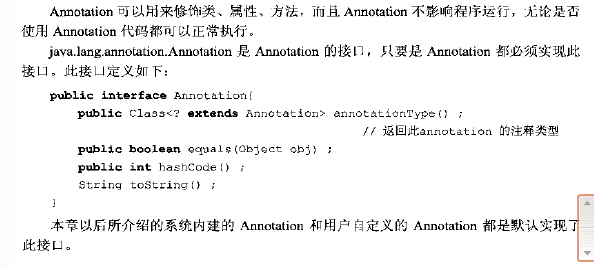
J2SE 5.0提供了很多新的特征。其中一个很重要的特征就是对元数据(Metadata)的支持。在J2SE 5.0中,这种元数据称为注解(Annotation)。
通过使用注解,程序开发人员可以在不改变原有逻辑的情况下,在源文件嵌入一些补充的信息。
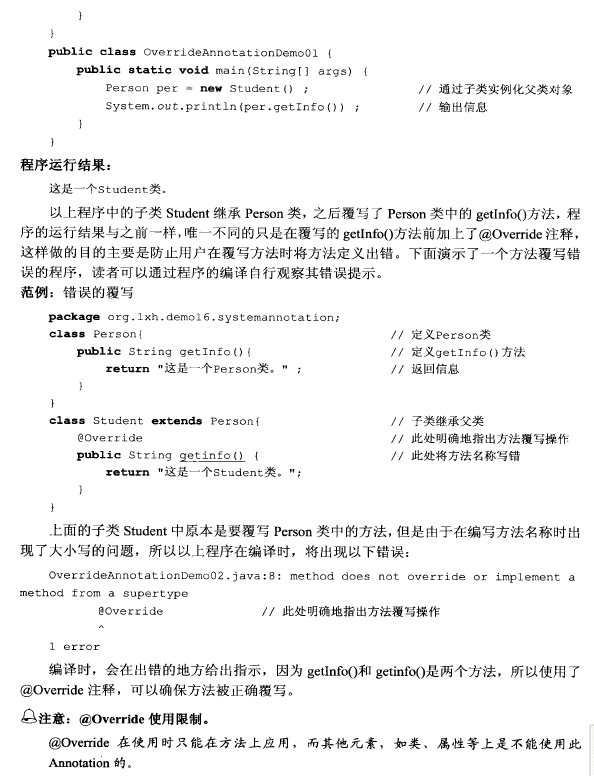
系统内建的Annotation
在JDK1.5之后,系统已经建立了如下3个内建的Annotation类型,用户直接使用即可。
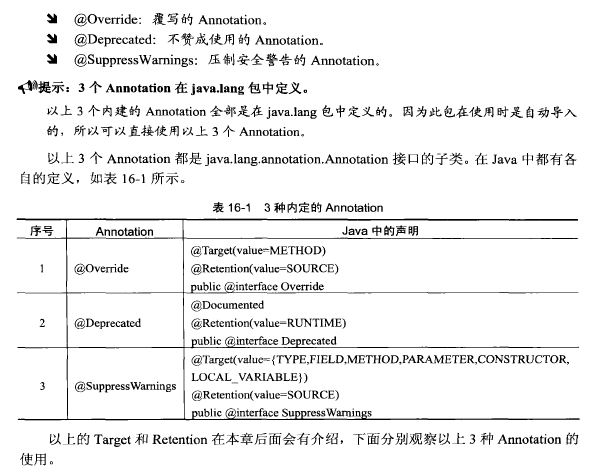
@Override